Android is one of the last decade’s most popular and widely used operating systems. There are billions of apps available on the Google Play Store that you can install on your Android device. Due to the increase in popularity and demand, developers have built Android emulators such as BlueStacks, allowing us to run Android apps on our Windows or Mac computers. BlueStacks builder has launched different versions of BlueStacks to meet user satisfaction. The latest version of BlueStacks is X. However, using some applications without superuser mode is often impossible. Superuser mode also extends the standard features of a virtual device; to achieve superuser mode abilities, we need to root BlueStacks. But here is a question, How to root BlueStacks latest version?
Of course, obtaining superuser rights in the emulator is significantly different from the smartphone procedure. Therefore, detailed instructions on this matter are discussed below. Before starting the rooting method discussion of BlueStacks, we need a basic introduction to BlueStacks.
What is Bluestacks Emulator?
Bluestacks is a platform that allows you to run and install Android games on your computer (PC). It is available on all versions of Windows or Mac. The program has been developed and improved for more than ten years. Bluestax is another application of BlueStacks that comes pre-installed with standard Android apps.
As of today, the latest version of BlueStacks is X. It has been in beta for a while, but now it has a stable version. Now, this version is ready to download for all users with HyperG graphics. The previous version of BlueStacks 5 was released in 2021, and gamers have been waiting a long time to download the enhanced version. The company says they have rewritten the new version, which is entirely different from BlueStacks 5. Now games will become much more apparent and give high FPS with less resource consumption.
Benefits of BlueStacks:
Smooth and Fast Gameplay: Speed is a priority, and BlueStacks is incredibly fast and one of the smoothest emulators. All performance parameters are configurable, up to setting the number of processors used and the amount of allocated RAM. For a standard gaming experience, allocate two cores and 1.5 GB of RAM.
Compatible with External Controllers: Most people find controllers much easier to use for gaming, and BlueStacks offers full compatibility for all external controllers, something most Android devices can’t.
Device Emulation: BlueStacks emulates your Android device, including phone number, model, IMEI number, and more, as well as many device-specific features.
Root Access: With the help of rooting apps, BlueStacks is rooted from the start, giving you easy access to files on your PC or Mac. Let’s move on to routing methods.
Advantages of Rooted BlueStacks:
Before considering the need to open superuser rights on the emulator, let’s get acquainted with its advantages, which you will not find in similar utilities for emulating Android devices on a PC.
First of all, the features of the program should include the ability implemented in it to run more than 95% of all software available in the Play Market. Programs, games, thematic applications, widgets, themes, and add-ons – you can now download all this and much more to your personal computer.
Also, software developers paid particular attention to the synchronization procedure. With this emulator, you no longer have to worry about losing data if, for example, you are working on the same application from different devices simultaneously. The emulator performs synchronization in real-time.
In addition to all of the above, the program also has a convenient menu.
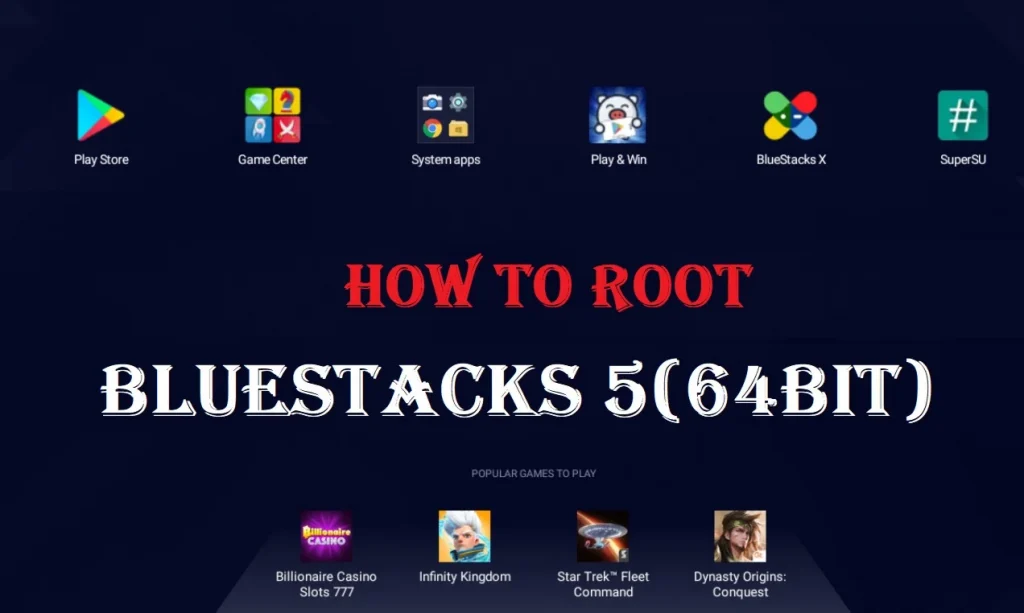
Let’s come toward our topic, “How to Root BlueStacks.”
Rooting with BSTweaker:
This is a unique application that allows you to comprehensively customize the emulator and improve its performance. The functionality of the program is prosperous. But in this case, we are only interested in one option.
First and foremost, install the latest version of BlueStacks (As of today, the latest version of BlueStacks is X). It will take 5 to 7 mint to run the complete setup on your PC. Keep in mind during BlueStacks installation, pause your antivirus for any inconvenience. After this, follow the undermentioned steps to root BlueStacks with BSTweaker.
Note Please: This Guied is 100% working for rooting all versions of BlueStacks.
Step By Step Guide:
1. Download BSTweaker 6.9.1(the latest version), which will be in a Zip folder, and extract files on your PC.
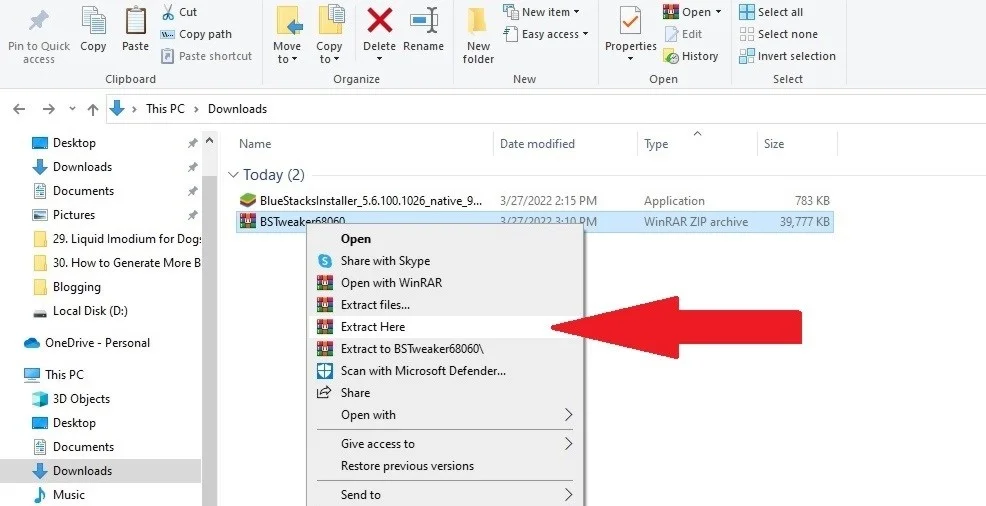
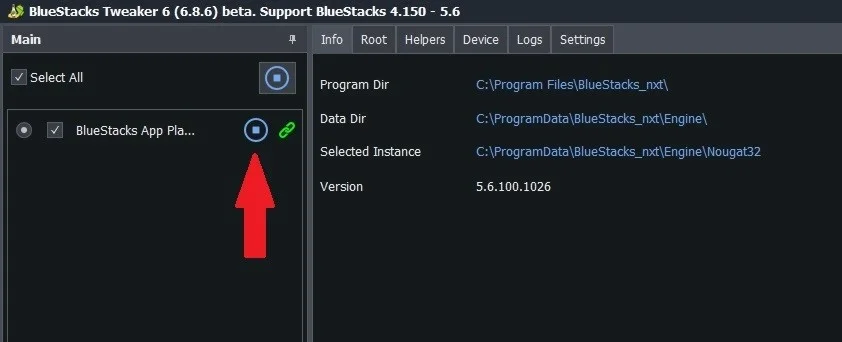
2. Install BSTweaker 6 from the extract files. After installation, it will automatically fetch BlueStacks data, and the Main Menu will appear like this.

3. If BlueStacks is running, close your BlueStacks manually or from the BSTweaker main menu page with the “Pause” button.
4. Click on the “root” tab in the menu bar.
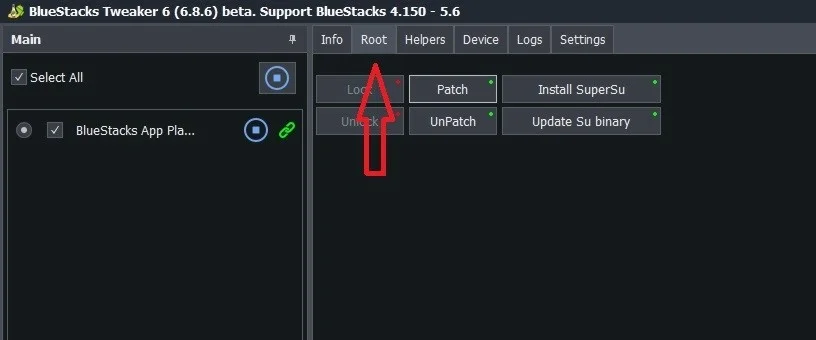
5. Find the “Unlock” button in the top left corner.

6. Warning menu will pop up. Just cancel it.

7. After clicking on cancel, unlocking will start automatically, and progress will show in the left corner.

8. After unlocking, start BlueStacks and tap on the “Play” Button on BSTweaker main page.
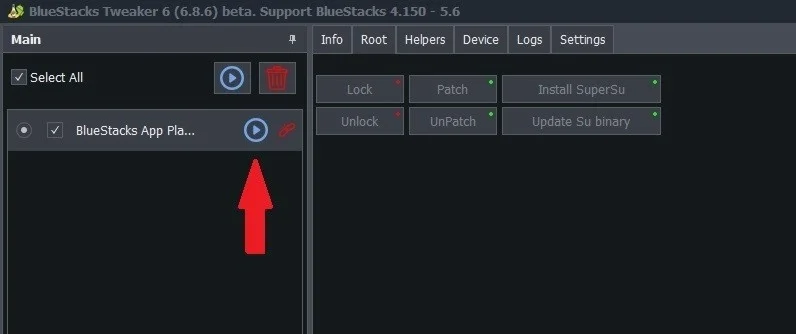
9. In the menu bar, tap on “Root” and find “Patch” in the top center of the screen.

10. Click on the “Patch” button. A true option will appear on the bottom left. It’s an indication that your patching is completed.
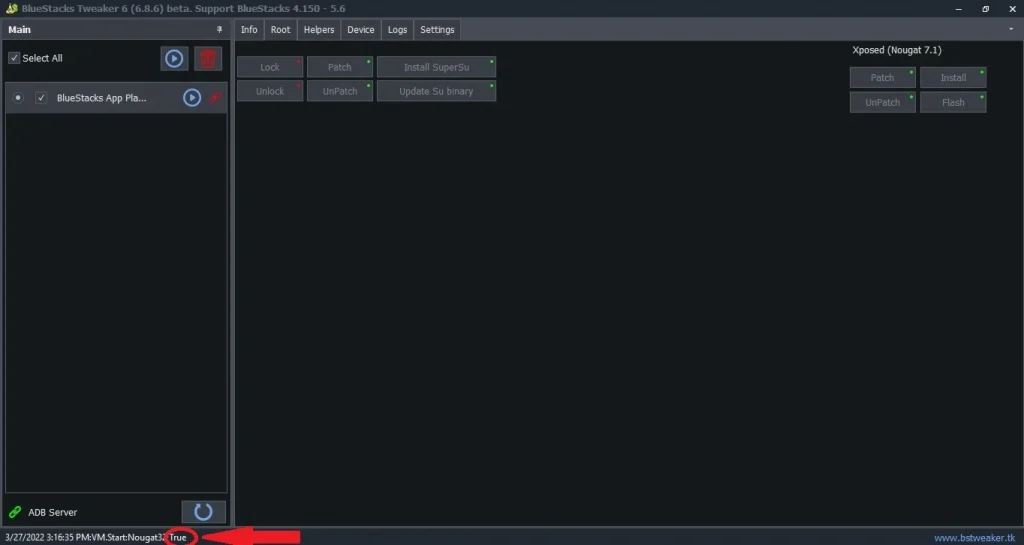
11. Tap on the “Install SuperSU” button.

12. Finally, don’t forget to update Su Binary by clicking on the “Update Su binary” button.
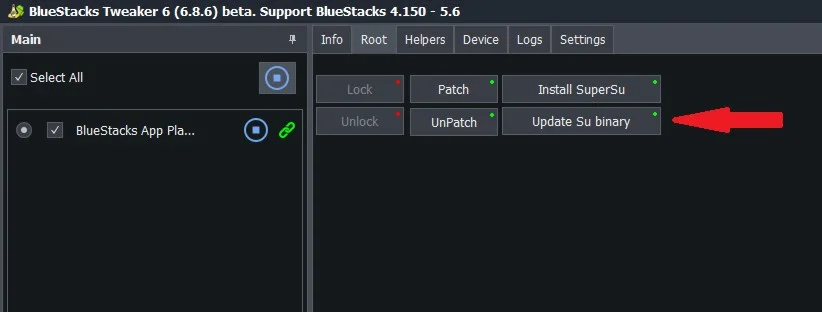
13. The word “True” on the bottom left indicates the correct updation of the Su binary.

14. Restart your BlueStacks 5 and enjoy a rooted BlueStacks.
15. At last, we will check our rooted BlueStacks; it’s rooted correctly or not?
16. Simply download “Root checker Basic” or any other root checker from the play store.
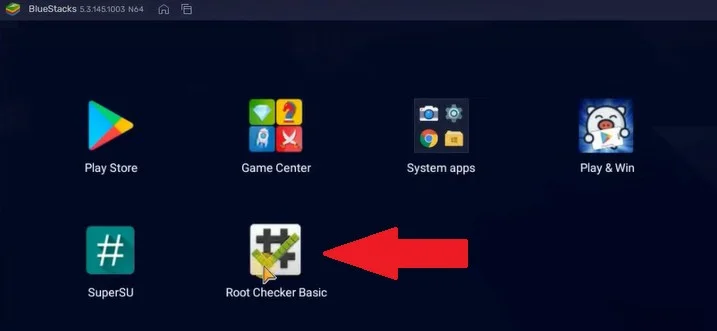
17. Open the root checker in BlueStacks and verify the root status by clicking on the “Verify Root” Button.
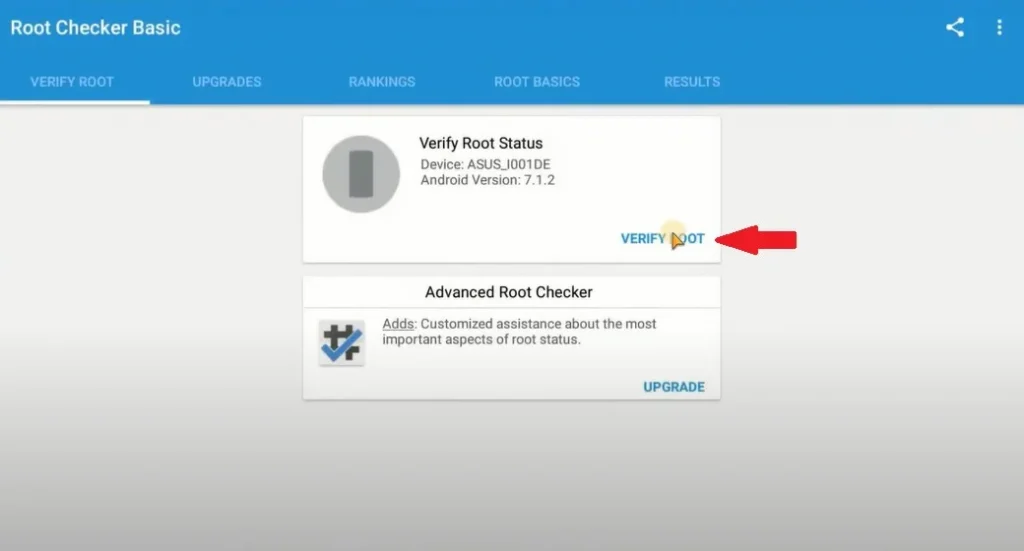
18. That’s all. Now your emulator has full root access.

Now you can easily install the corresponding applications and use them. This method is practically the only and most correct. You just need to follow the instructions.
Conclusion:
A significant advantage when working with BlueStacks: even if something terrible happens to the program, it can be reinstalled and configured – and you can experiment further. Drawing parallels with a phone on the Android operating system, it should be said that there are no risks of turning your device into a “brick”. Therefore, working with this application is safe.
We hope you found this article helpful. If you did, be sure to check out our blog for more great content like this.
Frequently Asked Questions (FAQs)
Rooting in Android is a process to expand administrative access on android devices. This process allows the user to execute different operations at a high level and have access to install applications requiring root access.
Obviously, BlueStacks 5 is better than BlueStacks 4. As we know, BlueStacks 5 beta was launched before BlueStacks 5 to view user experiences and improve its performance. BlueStacks 5 is faster than its predecessor, and if you’re looking for the absolute best performance, then BlueStacks 5 is the choice.
BlueStacks 5 is a simple android emulator where you can download and play your favorite Android games on a PC or MAC. Whereas BlueStacks X is a Hybrid Cloud technology where you can play your favorite Android games and run android apps.
This is undoubtedly good news for players with low-end PC. BlueStacks 5 is one of the best options for low-end PCs because of its better RAM management. BlueStacks claims their latest emulator has a much better RAM consumption than other Emulators.
Categorically yes, if you download and install the apps from the google play store, it’s safe. If you are using a third-party source, it may not be safe for your PC or MAC.
You can just open the BlueStacks Multi-Instance Manager and click on the New Instance Button to create a new instance and choose a fresh instance or Clone.
The answer is “No.” In the recent past, BlueStacks faced a security incident; after that, BlueStacks established an excellent security system and changed its consumer data policy.
No No No, BlueStacks is not a virus. There are many myths about the BlueStacks application, but these are all misconceptions.
No, BlueStacks didn’t cost a single penny.
DPI is a pixel density selection. You can change it by selecting a higher DPI on BlueStacks 5 and experience a much smoother shooting experience in games.
Yes, because the minimum system requirements for BlueStacks 5 is 2GB ram and 5GB Free Disk Space with Windows 7 or Windows 10 systems.
Mostly it happens when your PC allocates less ram to BlueStacks. It can be killed by allotting more RAM and CPU cores in BlueStacks Settings.
Go to “Settings” by clicking on the gear icon to do this. Click on the “Engine” tab and allocate a greater amount of RAM and CPU cores.

This is a great post! I was just wondering if there was a way to root blue stacks without having to use a computer.